
Table of Contents
Tired of the same old breakfast routine? Do you want a delicious, healthy, and gluten-free option? If you're nodding your head, then you're in the right place. We're about to flip your world with the ultimate gluten-free pancake recipe with oat flour. These aren't your average, bland, gluten-free pancakes. We're talking about fluffy, flavorful, and surprisingly easy-to-make pancakes that will have you wondering why you didn't try this sooner. We'll start by exploring why oat flour is such a fantastic choice, not just for those avoiding gluten, but for anyone seeking a nutritional boost. Then, we'll walk through the basic recipe, step-by-step, proving just how simple it is. From there, we'll dive into a world of variations and toppings, ensuring that your pancakes never get boring. We will also cover essential tips and tricks to avoid any pancake mishaps, and finally, we will tackle how to freeze and reheat them, making them the perfect option for busy mornings. Get ready to become a pancake pro, and say goodbye to breakfast boredom!
Why Oat Flour is a Game Changer
Why Oat Flour is a Game Changer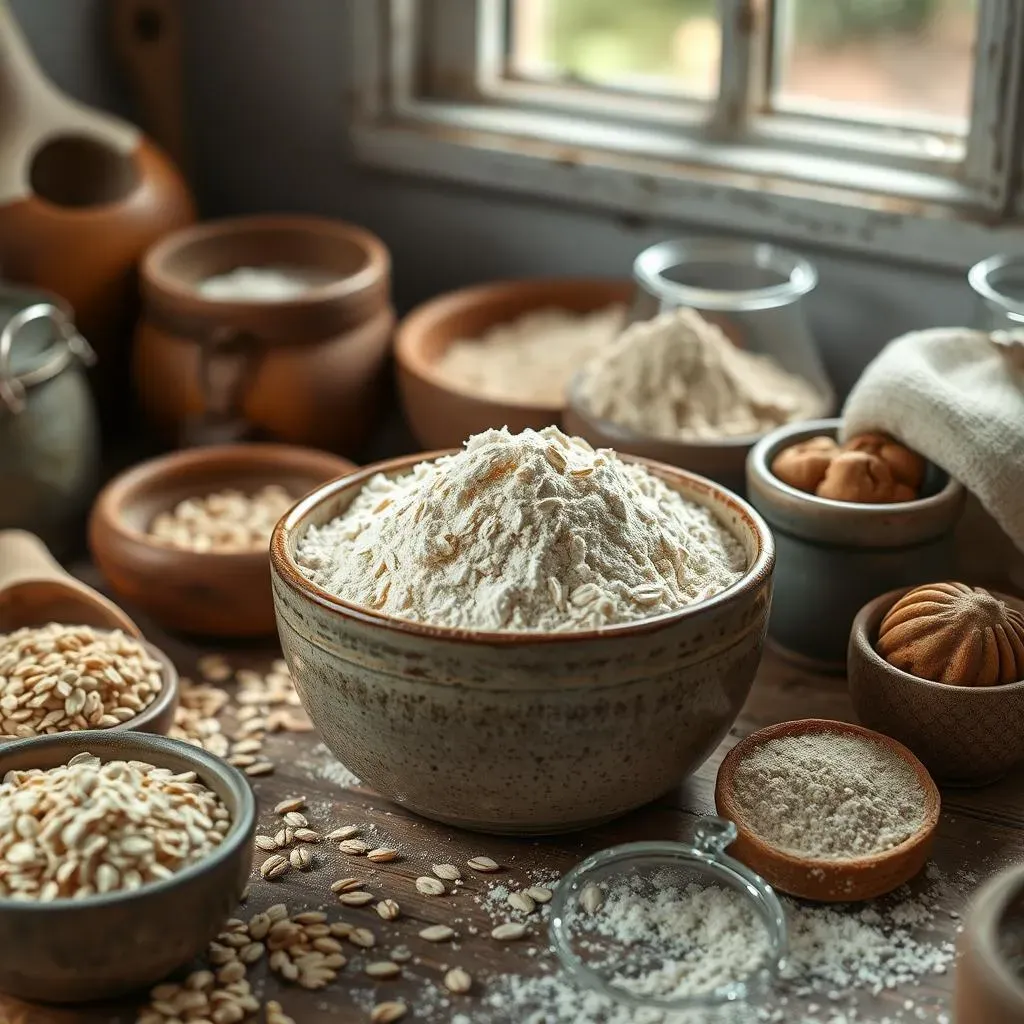
The Gluten-Free Secret Weapon
Okay, so you're knee-deep in the world of gluten-free baking, right? You've probably tried all sorts of flours, and some are hits, some are... well, let's just say they're not invited to the pancake party again. But oat flour? This stuff is a game changer. It's not just a substitute; it's a legit upgrade. Think of it as the cool kid on the block, strutting in with its nutritional benefits and subtle sweetness.
It's also super easy to get your hands on, and you can even make it yourself, which is awesome. We will discuss that later on.
More Than Just Gluten-Free
Let's talk about why oat flour is more than just a gluten-free alternative. It's packed with fiber, which is basically your gut's best friend. Fiber helps with digestion, keeps you feeling full, and even helps regulate blood sugar levels. It is also a great source of vitamins and minerals. You know, the stuff that keeps you going. Plus, it's got this naturally sweet thing going on, so you might even find yourself using less sugar in your recipes. It's like a win-win-win scenario.
And for those of us dealing with sensitive tummies, it's often easier to digest compared to some other gluten-free options. If you’re looking for a recipe for sensitive stomachs, this could be it.
Nutrient | Benefit |
|---|---|
Fiber | Aids digestion, promotes fullness |
Vitamins & Minerals | Supports overall health |
Natural Sweetness | Reduces need for added sugar |
Budget-Friendly and Easy to Find
We all love saving a few bucks, right? Oat flour is generally more affordable than some of those fancy, gluten-free blends. And you don't have to trek to some specialty store to find it. Most regular grocery stores carry it now, or you can just grab some rolled oats and turn them into flour yourself with a blender or food processor. It's like having your own flour mill at home. We will also talk about how to make it in the next section. You can also check out our best gluten-free recipe for more ideas.
For those with celiac disease, oat flour is a great option that doesn't break the bank. The recipe is also great because it is easy to make, making it ideal for beginners. Check out our easy gluten-free pancake recipe, if you are just starting out.
Mastering the Basic Recipe
Mastering the Basic Recipe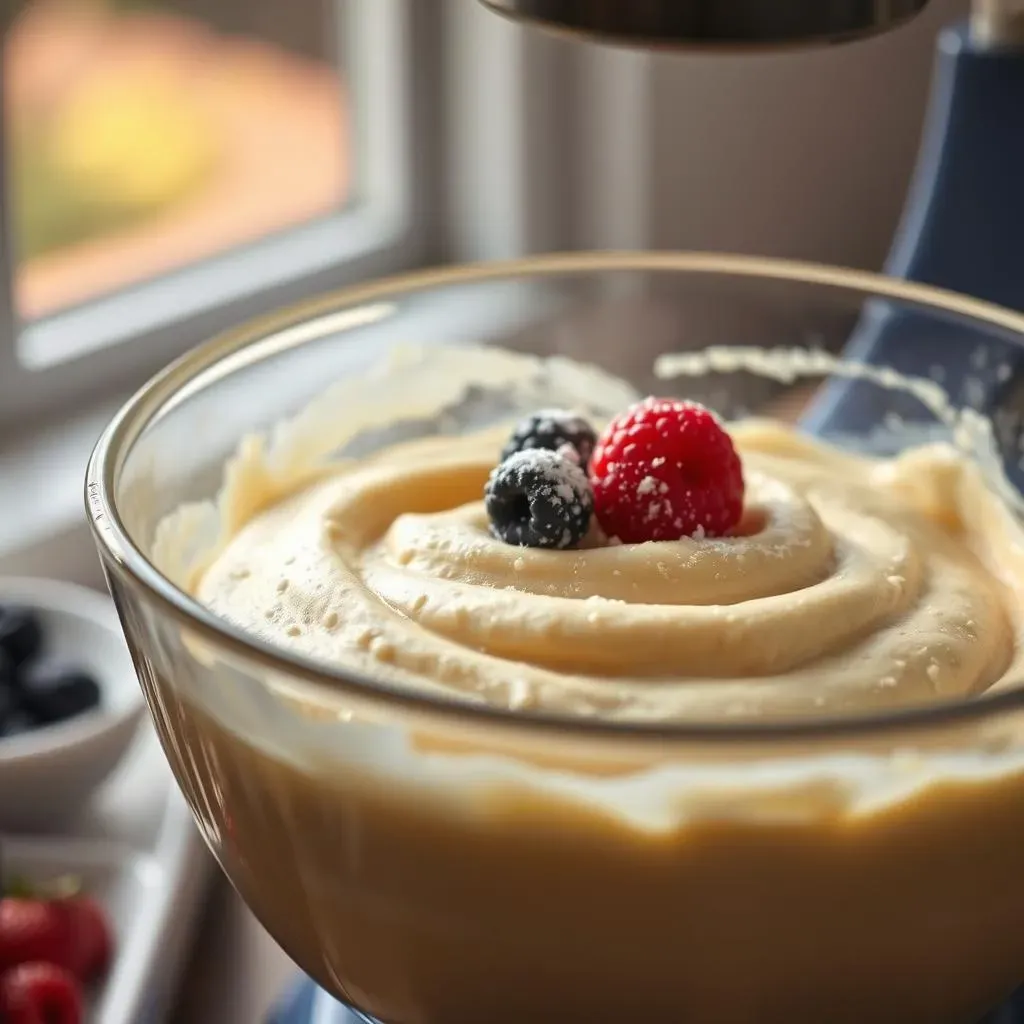
Alright, let's get to the fun part: actually making these pancakes. You’ll be amazed at how few ingredients you need. We're talking about stuff you probably already have in your kitchen. It’s a one-bowl wonder, which means less mess and more time enjoying your breakfast. Forget complicated steps or fancy techniques; this recipe is all about simplicity. You'll need oat flour, of course, plus some milk (dairy or non-dairy, your choice), an egg (or a flax egg if you're going vegan), a touch of sugar or honey for sweetness, a little baking powder to make them fluffy, and a pinch of salt to balance the flavors. That's it. Seriously.
Now, you might be wondering about xanthan gum, that common ingredient in gluten-free baking. Well, you don't need it here. The egg acts as a binder, keeping everything together perfectly. No weird textures, no gummy results. Just good old-fashioned, delicious pancakes. If you want to explore other gluten-free options, see this gluten-free pancake comparison.
Here's a quick rundown of the key ingredients and their roles:
- Oat Flour: The star of the show, provides structure and flavor.
- Milk: Adds moisture and helps create a smooth batter.
- Egg: Acts as a binder and helps with texture (or flax egg for vegan).
- Sugar/Honey: Provides sweetness.
- Baking Powder: Makes the pancakes fluffy.
- Salt: Enhances the flavors.
You can also explore other recipes that use a blend of flours, but this recipe is all about simplicity.
Making the batter is as easy as whisking all the ingredients together until you have a smooth consistency. Don't overmix it; a few lumps are totally fine. Let the batter sit for a few minutes while your pan heats up. This allows the oat flour to absorb the liquid, resulting in lighter pancakes. You’ll notice it gets a bit thicker, which is exactly what you want. Then, simply pour the batter onto a hot, lightly greased griddle or pan, and cook until golden brown on both sides. It's like a pancake party in your kitchen, and everyone's invited! If you're looking for a quick breakfast, this recipe fits the bill perfectly. Check out our quick breakfast recipes for more inspiration.
Variations and Toppings for Every Mood
Variations and Toppings for Every Mood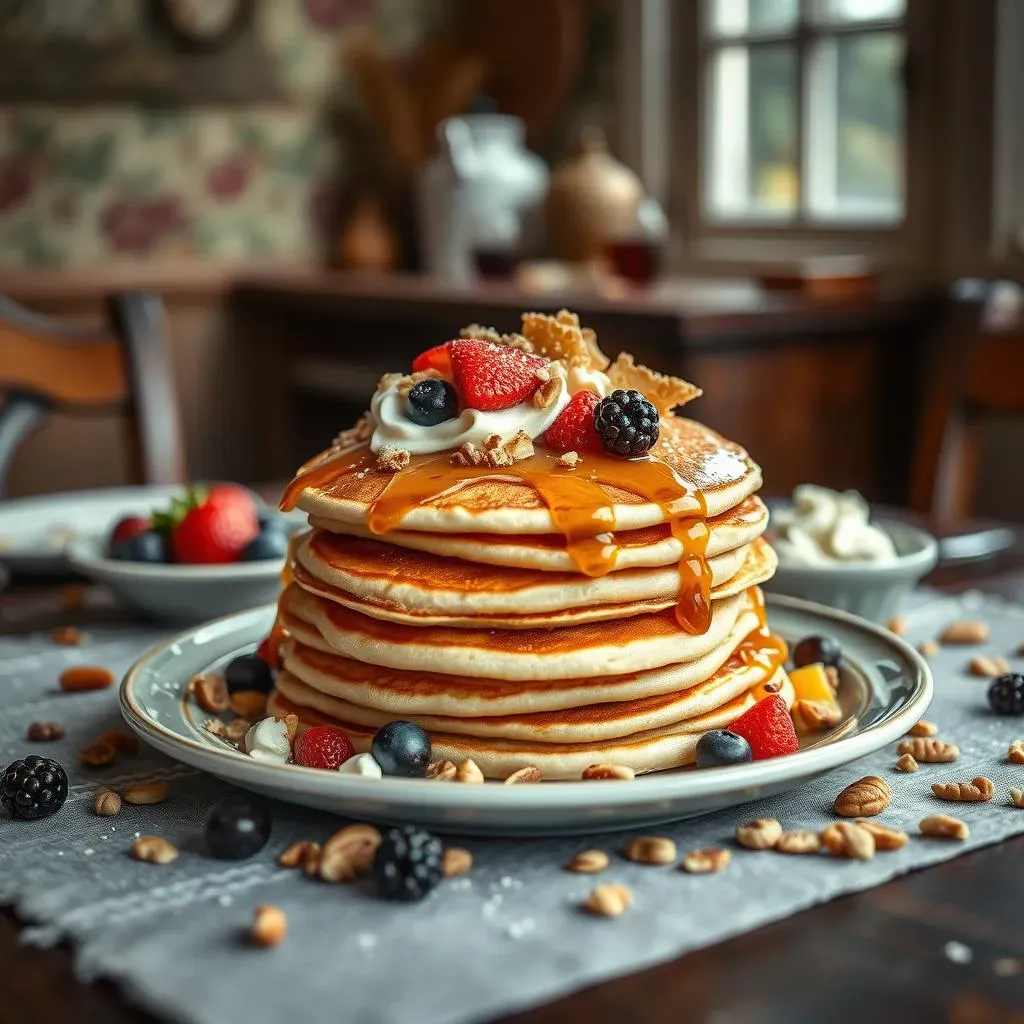
Level Up Your Pancakes
Okay, so you've nailed the basic recipe, congrats! But let’s be honest, eating the same pancakes every day can get a little... predictable. That's where variations come in. Think of the basic recipe as your blank canvas, ready to be transformed into a masterpiece. You can add a mashed banana to the batter for extra moisture and sweetness, or a handful of blueberries for a burst of juicy goodness. Chocolate chips are always a good idea, and a dash of cinnamon or nutmeg can bring a warm, cozy vibe. Don't be afraid to experiment, this is where your creativity can shine.
If you’re looking for something more adventurous, try adding some lemon zest or a spoonful of peanut butter. The possibilities are endless. And if you’re trying to sneak in some extra nutrients, a scoop of protein powder can do the trick. For more ideas, check out this gluten-free pancake with protein powder recipe.
Pancake Customization Ideas
- Fruity Fun: Add mashed banana, blueberries, or raspberries.
- Chocolate Lover: Mix in chocolate chips or cocoa powder.
- Spice it Up: Use cinnamon, nutmeg, or ginger.
- Nutty Delight: Add peanut butter, almond butter, or chopped nuts.
- Extra Nutrients: Mix in protein powder.
Topping Extravaganza
Now, let's talk toppings. Because what's a pancake without a proper topping? Maple syrup is a classic for a reason, but don't let that limit you. Fresh berries are always a winner, providing a pop of color and flavor. A dollop of Greek yogurt adds a creamy tang, and a sprinkle of chopped nuts brings some crunch. If you're feeling a bit indulgent, a drizzle of melted chocolate or a scoop of whipped cream is never a bad choice. And for those who like things a little different, try a sprinkle of coconut flakes or a dusting of powdered sugar. It’s your pancake, your rules.
You can also consider making a homemade fruit compote or a simple caramel sauce. And for those with dietary restrictions, there are plenty of dairy-free and vegan options available. Want to make it even better? Try topping your pancakes with a bit of honey. Check out our gluten-free pancake recipe with honey for some inspiration.
Topping Ideas
Topping Type | Examples |
|---|---|
Syrups | Maple syrup, honey, agave nectar |
Fruits | Fresh berries, sliced bananas, fruit compote |
Creams | Greek yogurt, whipped cream, coconut cream |
Extras | Chopped nuts, chocolate shavings, powdered sugar |
Tips and Tricks for Pancake Perfection
Tips and Tricks for Pancake Perfection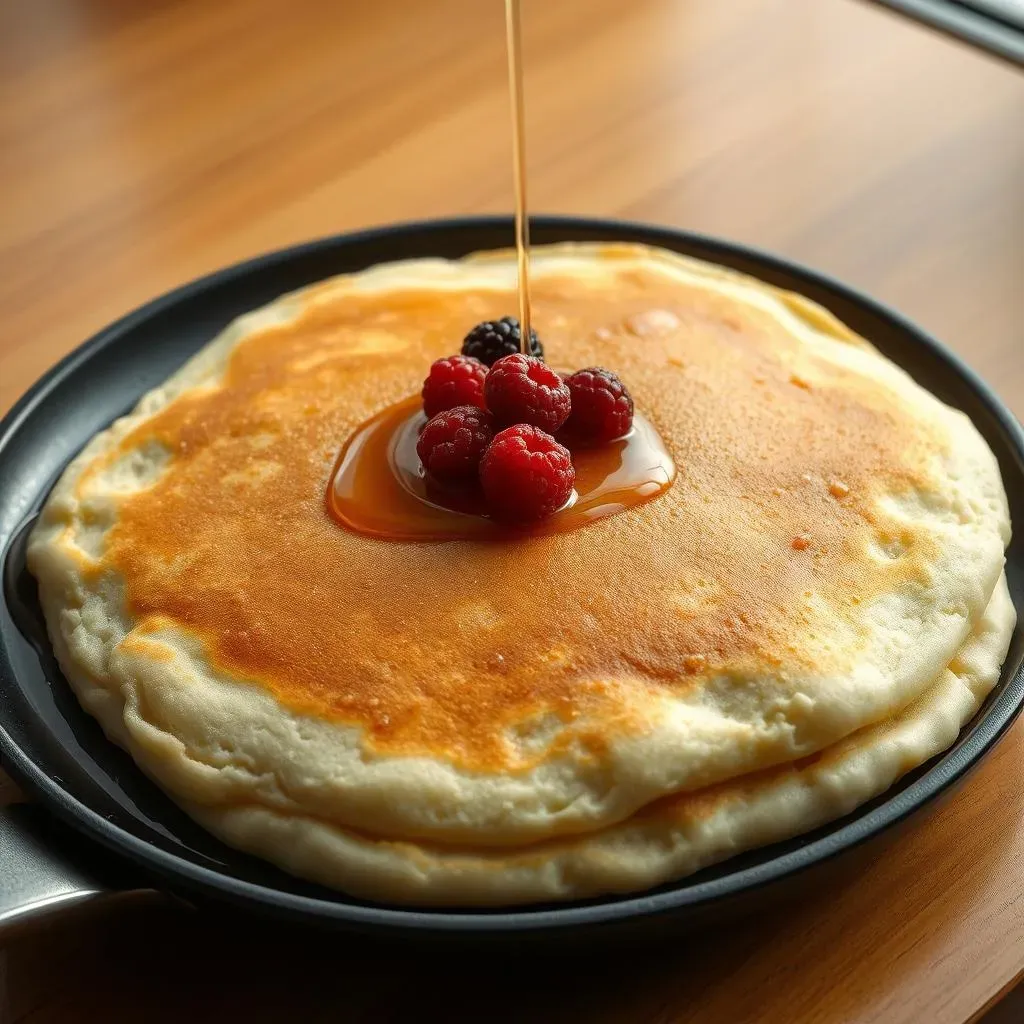
The Art of the Batter
Alright, let's talk batter, because that's where the magic happens. First off, don't overmix it. Seriously. Overmixing develops the gluten (even in gluten-free flours, it can cause a weird texture) and leads to tough, chewy pancakes. You want a light hand, just enough to combine the ingredients. A few lumps are totally fine, don't stress about them. Also, let your batter rest for a bit, like 5-10 minutes. This allows the oat flour to fully absorb the liquid, which will give you fluffier pancakes. It's like letting the batter take a little breather before showtime.
Another trick is to use room temperature ingredients. Cold milk and eggs can sometimes cause the batter to seize up, resulting in a less smooth consistency. And if you find your batter is too thick, add a tablespoon of milk at a time until it reaches the desired consistency. It should be pourable, but not too runny. If you are new to gluten free cooking, you can try our easy gluten free pancake recipe.
Batter Tips
- Don't overmix
- Let it rest
- Use room temperature ingredients
- Adjust the thickness as needed
The Heat is On
Now, let’s talk heat. You want your griddle or pan to be nice and hot before you start cooking. Not scorching hot, but hot enough that a drop of batter sizzles gently. I like to use medium heat; it gives the pancakes enough time to cook through without burning on the outside. A lightly greased pan is also key. You can use butter, oil, or even cooking spray. Just make sure it's evenly coated to prevent sticking. And don’t overcrowd the pan! Give each pancake enough space to cook properly. You can also use a cookie cutter to make them uniform in size and shape. If you are looking for a recipe for your toddler, check our gluten free pancakes for toddlers.
Also, patience is a virtue when it comes to pancakes. Don't flip them too soon! Wait until you see bubbles forming on the surface and the edges start to look set. Then, gently slide a spatula underneath and flip them over. They should be golden brown on both sides. If you are having some issues, check our troubleshooting guide.
Heat Level | Effect |
|---|---|
Low | Pancakes cook slowly, may become dry |
Medium | Pancakes cook evenly, golden brown |
High | Pancakes burn easily, may be uncooked in the center |
DIY Oat Flour and Other Secrets
Okay, so you're out of oat flour, or you just want to be a bit more DIY? No problem! You can easily make your own oat flour at home. Just take some rolled oats (make sure they’re gluten-free if needed) and throw them into a blender or food processor. Blend until you get a fine flour. It's that simple! You might need to stop and shake the blender a few times to make sure everything gets ground up evenly. It’s a great way to save some money and always have fresh flour on hand. If you are making it at home, make sure your oats are gluten-free, especially if you are celiac or have gluten intolerance. You can also use rice flour if you are out of oat flour.
Another tip is to use a non-stick pan. It makes your life so much easier, and you can use less grease. Also, a little lemon juice or apple cider vinegar can help make the pancakes extra fluffy. Just a teaspoon or so is enough. And finally, don't be afraid to experiment with different spices and flavorings. A little vanilla extract or almond extract can make a big difference. You can also check our blend of flours recipe if you want to experiment.
Freezing and Reheating for Quick Breakfasts
Freezing and Reheating for Quick Breakfasts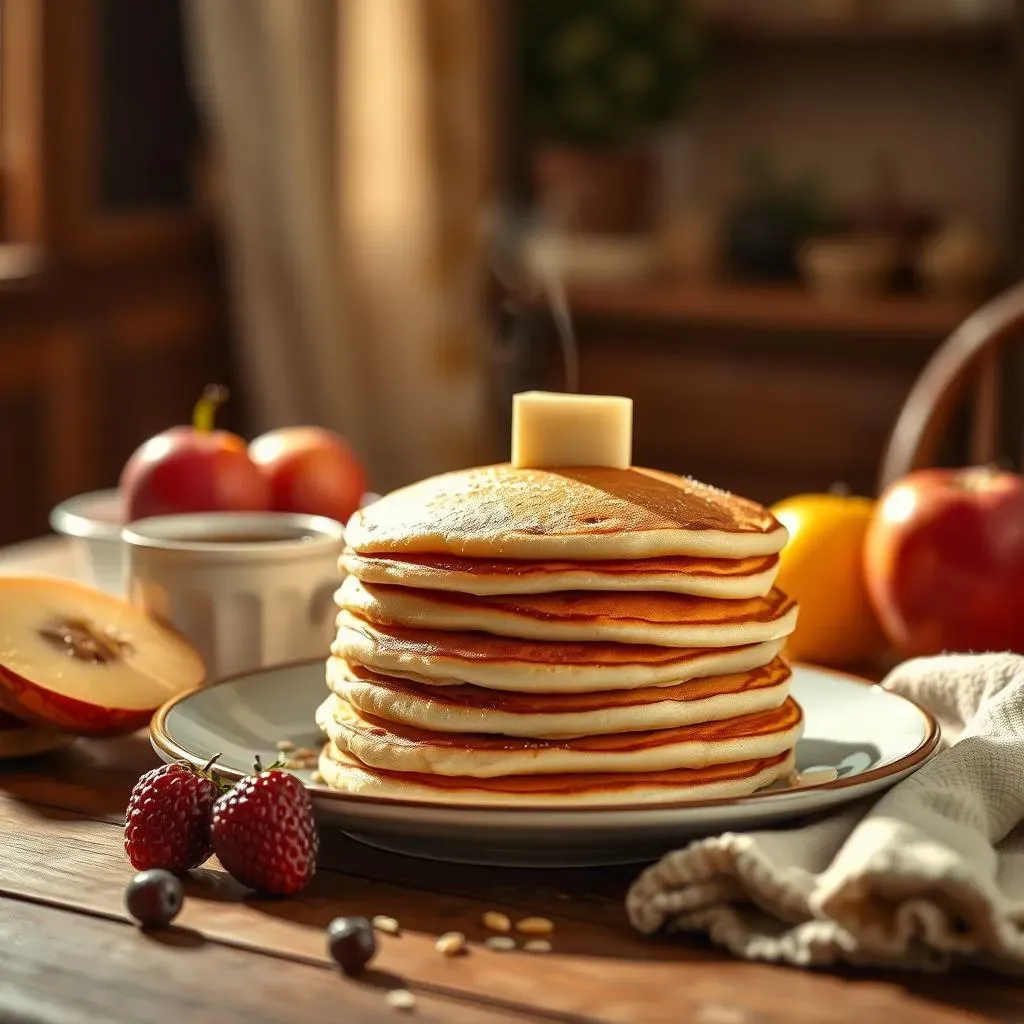
The Freezer: Your Pancake's Best Friend
Okay, let's talk about making your life easier. You've made a big batch of these amazing oat flour pancakes, and now you're thinking, "Can I save these for later?" Absolutely! Freezing pancakes is a game-changer, especially if you're like me and don't always have time to cook from scratch every morning. The key is to freeze them properly so they don't turn into a soggy mess. Once your pancakes are cooked and cooled, you can stack them with parchment paper in between to prevent sticking. Then, just pop them into a freezer-safe bag or container. You can also flash freeze them individually on a baking sheet before stacking them, which will also keep them from sticking. They’ll keep in the freezer for a couple of months, which is pretty sweet. If you're looking for other ways to make breakfast easy, see our quick breakfast recipes.
Think of it this way: you're essentially creating your own personal stash of ready-to-eat pancakes. No more scrambling to make breakfast on those busy mornings. Just grab a few from the freezer, reheat, and you're good to go. It's like having a magical pancake fairy in your freezer. Also, if you have kids, this is a great way to make sure they have a good breakfast. You can also check out our gluten-free pancake recipe for toddlers.
Step | Description |
|---|---|
1 | Cool pancakes completely. |
2 | Layer with parchment paper. |
3 | Place in freezer-safe bag or container. |
Reheating Like a Pro
So, you've got your frozen pancakes, and now you're wondering how to make them taste like they're fresh off the griddle. Don't worry, it's easier than you think. There are a few ways to reheat them, and each has its own perks. The toaster is a great option for a quick reheat. Just pop them in like you would a slice of bread, and they'll be warm and slightly crispy in minutes. If you want a softer result, the microwave works well too. Just heat them in short bursts to avoid them getting rubbery. You can also reheat them in a pan on the stove with a little butter or oil. This gives them a nice, slightly crispy texture. Choose your method, and enjoy!
I personally love using the toaster because it's so quick and easy, and it gives the pancakes a nice texture. But honestly, all the methods work great. It’s all about what you have available and how much time you’ve got. No matter which method you use, you’ll be enjoying a warm, delicious pancake in no time. And if you're having a weekend brunch, this tip is a lifesaver. Check out our weekend brunch recipes for more ideas.
- Toaster: Quick and slightly crispy.
- Microwave: Soft and quick.
- Stovetop: Slightly crispy and warm.
Storage Tips for Maximum Freshness
Okay, so you know how to freeze and reheat, but let’s talk about storage. Proper storage is essential for keeping your pancakes tasting great. If you're not freezing them, you can store them in an airtight container in the fridge for a couple of days. Make sure they’re completely cooled before storing them, or you risk condensation, which can make them soggy. Also, be sure to use parchment paper in between, just like when you are freezing them. And if you're planning to freeze them, make sure they are completely cooled before you put them in the freezer bag or container. This will help them maintain their texture. Also, if you are using a freezer bag, make sure to press out all the excess air before you seal it. You can also check out our blender pancake recipe for an easy batter option.
So, there you have it: the complete guide to making, freezing, and reheating oat flour pancakes. It’s all about making your life easier and ensuring that you have delicious, gluten-free pancakes whenever you want them. And let's be real, who doesn't want that? With these tips and tricks, you’re now a pancake master. Go forth and conquer breakfast! You can also use these tips for other gluten free pancakes, like our coconut flour pancakes.
Wrapping Up Your Gluten-Free Pancake Journey
So, there you have it—a complete guide to mastering the art of the gluten-free pancake using oat flour. From understanding why oat flour is a nutritional superstar, to creating the perfect batter, experimenting with toppings, and even storing leftovers, you're now equipped to make amazing pancakes anytime. This simple recipe opens up a world of possibilities, whether you are looking for a quick weekday breakfast or a special weekend brunch. It is also a great option for people with dietary restrictions. Go ahead, get creative, have fun with it, and most importantly, enjoy every delicious bite! Remember, the best meals are those made with love and a little bit of experimentation. Happy cooking!