Table of Contents
Ever since I was a kid, the smell of pancakes sizzling on a griddle meant it was going to be a good day. My grandma had this old electric skillet, and she could whip up the most incredible, fluffy pancakes. Now, my own kids are hooked on them. They call them "Grandma's pancakes," and honestly, I think they're better than any restaurant version. Today, I’m sharing my secrets for making perfect pancakes using an electric skillet. Forget those sad, flat disks – we're talking golden brown, cloud-like stacks that are ready for all the toppings you can imagine. We’ll cover everything from getting the skillet perfectly preheated to mixing the batter just right. This isn’t just a recipe; it’s a journey to mastering the art of the electric skillet pancake. You will discover the best pancake cooking tips for electric skillet, from the right temperature to achieving that perfect flip, and even how to store leftovers (if there are any!). So, grab your apron, and let’s get cooking!
Getting Started: Electric Skillet Prep for Pancakes
Getting Started: Electric Skillet Prep for Pancakes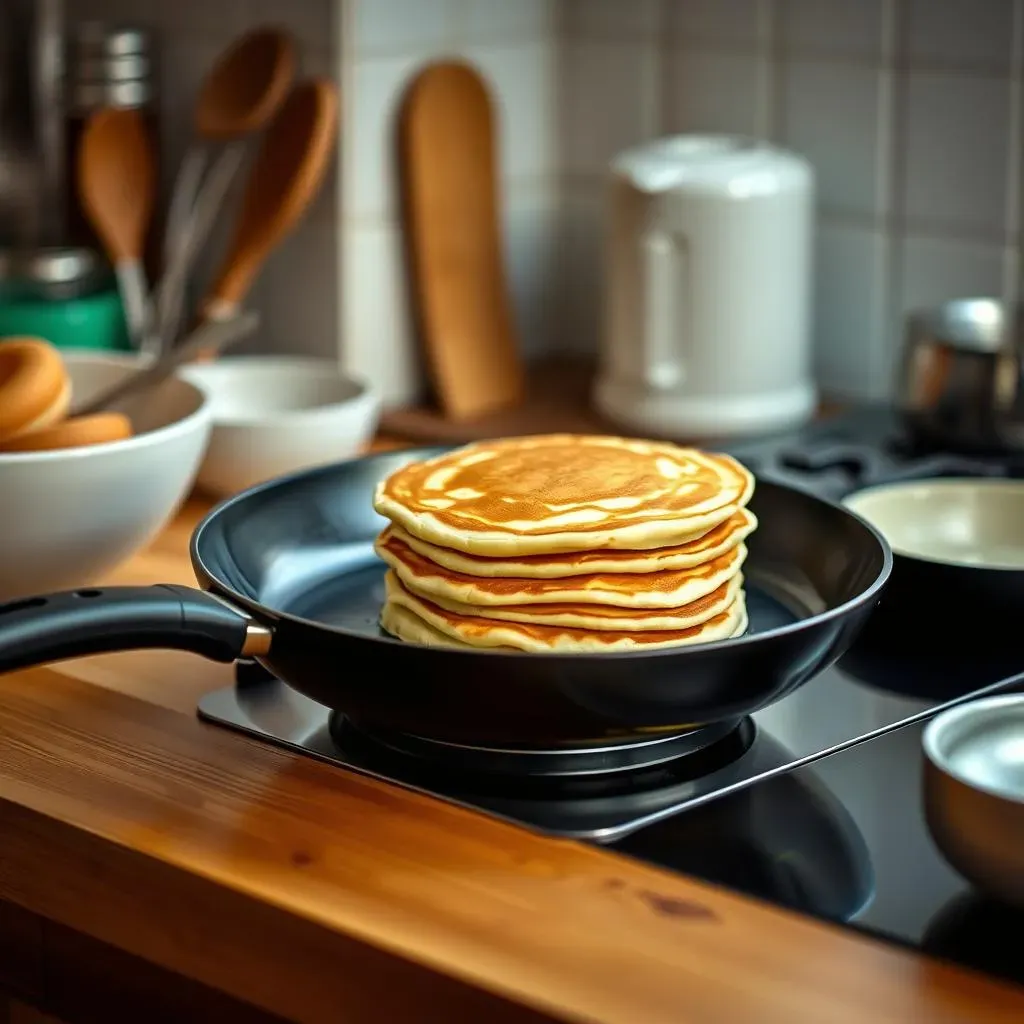
The Importance of Preheating
Alright, so you're ready to make some pancakes? Awesome! First things first, we gotta talk about preheating your electric skillet. I know, it sounds like a no-brainer, but trust me, it's a game-changer. Think of it like warming up your car on a cold morning; you wouldn't just hop in and floor it, right? The same goes for your skillet. Preheating ensures that your pancakes cook evenly and get that beautiful golden-brown crust we all crave. A cold skillet leads to unevenly cooked pancakes, with some parts pale and others burnt. Not ideal, my friend, not ideal.
So, how do you know when it’s ready? Most electric skillets have a little indicator light that turns on when it reaches the set temperature. If yours doesn’t, a good rule of thumb is to set it to about 375°F (190°C) and let it heat up for around 5-10 minutes. This gives the entire surface area time to get nice and hot. Don't rush it; patience is key here. You want that skillet surface to be ready to greet the batter, not just lukewarm.
Skillet Surface Prep
your skillet is hot, now what? Well, before you start pouring in the batter, you need to prep the surface. Non-stick skillets are great, but even they need a little help. I like to lightly grease mine with either a bit of butter or a neutral oil. Butter adds a nice flavor, but it can burn at higher temps, so keep an eye on it. If you’re using oil, something like canola or vegetable works perfectly. Don't go overboard; just a light coating is all you need. Too much grease and your pancakes will be swimming in oil, not what we want.
I usually use a paper towel to spread the grease around, ensuring that the entire surface is evenly coated. This helps prevent the pancakes from sticking and gives them that lovely, crispy edge. It's like giving your pancakes a little non-stick runway to take off on. If you skip this step, you might find yourself scraping bits of pancake off your skillet, and nobody wants that.
Step | Action | Why |
|---|---|---|
1 | Set skillet to 375°F (190°C) | Ensures even cooking |
2 | Wait 5-10 minutes | Allows skillet to reach proper temp |
3 | Lightly grease surface | Prevents sticking |
Temperature Control
Now, let's talk about temperature control. This is where many pancake dreams go to die. If your skillet is too hot, your pancakes will burn on the outside and be raw on the inside. Too cold, and they’ll be pale and soggy. It's a delicate balance, folks. Most electric skillets have a thermostat dial, so you can adjust the heat as needed. I usually start at 375°F (190°C), but I’m not afraid to nudge it up or down a bit depending on how things are going. It's all about finding that sweet spot for your specific skillet.
If you notice your pancakes are cooking too fast, don’t be afraid to lower the heat a tad. Conversely, if they’re taking forever to brown, you might need to turn it up slightly. It's a bit of an art, not a science, and it takes some practice. The key is to be patient and observant. Watch your pancakes, see how they’re reacting, and adjust accordingly. You'll get the hang of it, I promise!
Mastering the Batter: Key Ingredients and Mixing Tips
Mastering the Batter: Key Ingredients and Mixing Tips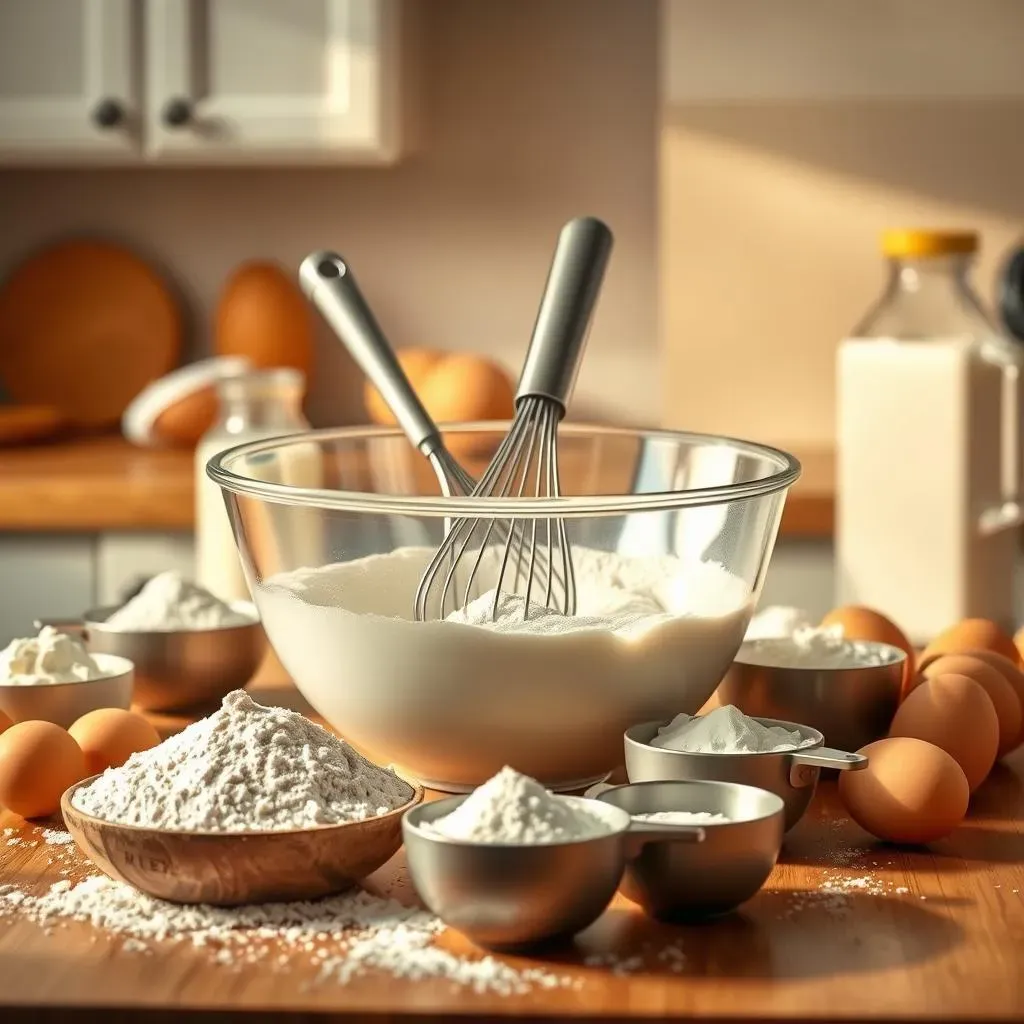
The Foundation: Essential Dry Ingredients
so now that we’ve got our skillet prepped and ready, let's talk batter. It's the heart and soul of any good pancake, right? First up, the dry ingredients. You’ll need all-purpose flour, that's your base. I always keep a big bag in my pantry. Then, you'll need some sugar, just a couple of tablespoons to give it a little sweetness. Don't go overboard; remember, we have syrup for that. And the secret weapon? Baking powder! This is what gives our pancakes that light and fluffy texture. Don't skip it! I’ve seen people try to substitute baking soda, and it's not the same, trust me. A pinch of salt is essential too to balance the sweetness and enhance the flavors.
I like to whisk all these dry ingredients together in a large bowl before adding the wet stuff. It's like preparing the stage for the main event. Whisking ensures that the baking powder and salt are evenly distributed, so you don’t end up with pockets of saltiness or areas that don't rise properly. It’s a small step, but it makes a big difference. Think of it as getting your team ready before the big game. You wouldn't want anyone to be out of place, would you?
The Wet Wonders: Combining Liquids
Next up, the wet ingredients. We're talking milk, eggs, and a little melted butter. The milk adds moisture, making the pancakes nice and tender. I usually use regular cow’s milk, but you can swap it out for almond or soy if you prefer. Eggs are the glue that holds everything together, providing structure and richness. And the melted butter? That's for flavor and a bit of extra tenderness. Don't use cold butter; it will clump up and not mix properly. Melt it gently in the microwave or a small saucepan, and let it cool slightly before adding it to the mix.
When you add the wet ingredients, do it gradually. Pour them into the dry ingredients and gently mix with a spatula or a whisk. You don’t want to overmix the batter. Overmixing develops the gluten in the flour, which can make your pancakes tough and chewy, not fluffy and light. Mix until just combined, and don't worry if there are a few lumps. Those lumps will melt away when they hit the hot skillet. The goal is to have a smooth, pourable batter, not a perfectly smooth, over-worked one. Remember, less is more when it comes to mixing.
Ingredient | Purpose | Tips |
|---|---|---|
All-Purpose Flour | Base | Measure accurately |
Sugar | Sweetness | Don't overdo it |
Baking Powder | Leavening | Use fresh |
Salt | Flavor | Just a pinch |
Milk | Moisture | Can substitute |
Eggs | Structure | Use fresh |
Melted Butter | Flavor & Tenderness | Cool slightly |
The Art of the Mix: Avoiding Overmixing
So, you've got all your ingredients ready, you've combined them, and now what? The biggest mistake people make is overmixing the batter. I can't stress this enough. Overmixing develops the gluten in the flour, resulting in dense, tough pancakes. You want light and fluffy, not hockey pucks. When you're mixing, aim for just combined. That means mixing until you don't see any streaks of dry flour anymore. It’s okay if there are a few lumps; they’ll disappear as the batter rests. Think of it like gently folding clothes; you don't want to wrinkle them, and you don't want to overwork your batter.
Once your batter is mixed, let it rest for a few minutes, about 5-10 minutes. This resting period allows the baking powder to work its magic, creating tiny air bubbles that will make your pancakes extra light and fluffy. I know, it’s hard to wait, but trust me, it’s worth it. It's like letting your dough rise before baking bread; it needs time to do its thing. While it rests, you can prep your toppings, grab your syrup, and get ready to flip some perfect pancakes. It's a little pause before the pancake party begins!
Pancake Cooking Tips: Achieving Golden Perfection on Your Electric Skillet
Pancake Cooking Tips: Achieving Golden Perfection on Your Electric Skillet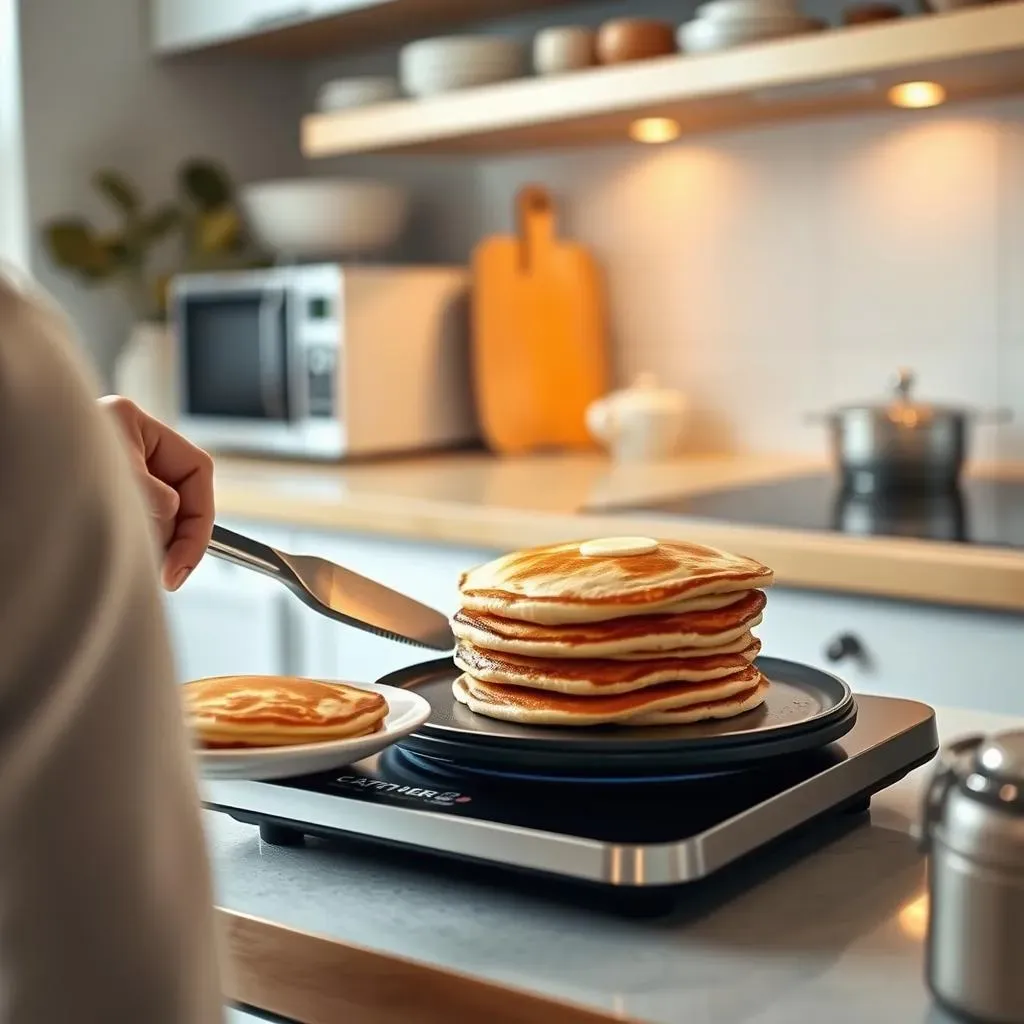
Pouring Perfection: The First Step to a Great Pancake
so you've got your batter resting, your skillet is hot, and you're ready to go. Now, it's all about the pour. Don't just dump a big glop of batter onto the skillet; you want to be a little more strategic than that. I usually use a 1/4 cup measuring cup to scoop the batter, ensuring that each pancake is about the same size. This helps them cook evenly. Pour the batter gently onto the hot skillet, and resist the urge to spread it around. Let the batter settle on its own; this will give you those nice round pancakes. If you start trying to shape them, you'll end up with something that looks more like a blob than a beautiful pancake.
When pouring, leave a little space between each pancake. This prevents them from running into each other and allows for even cooking. Think of it like giving each pancake its own little dance floor; you want them to have enough room to twirl without bumping into each other. If you overcrowd the skillet, you'll end up with a mess of conjoined pancakes, and nobody wants that. So, pour slowly, pour deliberately, and give each pancake the space it needs to shine.
The Flip: When and How to Do It Right
Alright, so your pancakes are sizzling away, you're watching them closely, and now comes the moment of truth – the flip. This is where many a pancake has met its demise, but don't worry, I've got you covered. You'll know it's time to flip when you see bubbles forming on the surface of the pancake, and the edges look set. The bottom should be golden brown, but don't flip prematurely. You want the pancake to be sturdy enough to handle the flip without falling apart. I usually use a thin, flexible spatula to get under the pancake, and I flip it with a quick, confident motion. No hesitation! If you're timid, you might end up with a pancake that's half-flipped, half-stuck to the skillet.
Once you've flipped the pancake, let it cook for another minute or two on the other side until it’s also golden brown. Don't press down on the pancake with your spatula; this will squeeze out all the air bubbles and make it dense. Let it cook undisturbed, and you'll be rewarded with a perfectly golden, fluffy pancake. It’s like giving it a little time to rest after a big performance. Remember, patience is key when you are making the perfect pancake. This part is all about timing and gentle handling.
Action | Timing | Why |
|---|---|---|
Pour Batter | Use 1/4 cup | Ensures even size |
Wait for Bubbles | Surface bubbles appear | Indicates ready to flip |
Flip Pancake | Quick, confident motion | Avoid tearing |
Cook Second Side | 1-2 minutes | Golden brown |
Serving and Beyond: Toppings, Storage, and More Electric Skillet Ideas
Serving and Beyond: Toppings, Storage, and More Electric Skillet Ideas
The Fun Part: Topping Time!
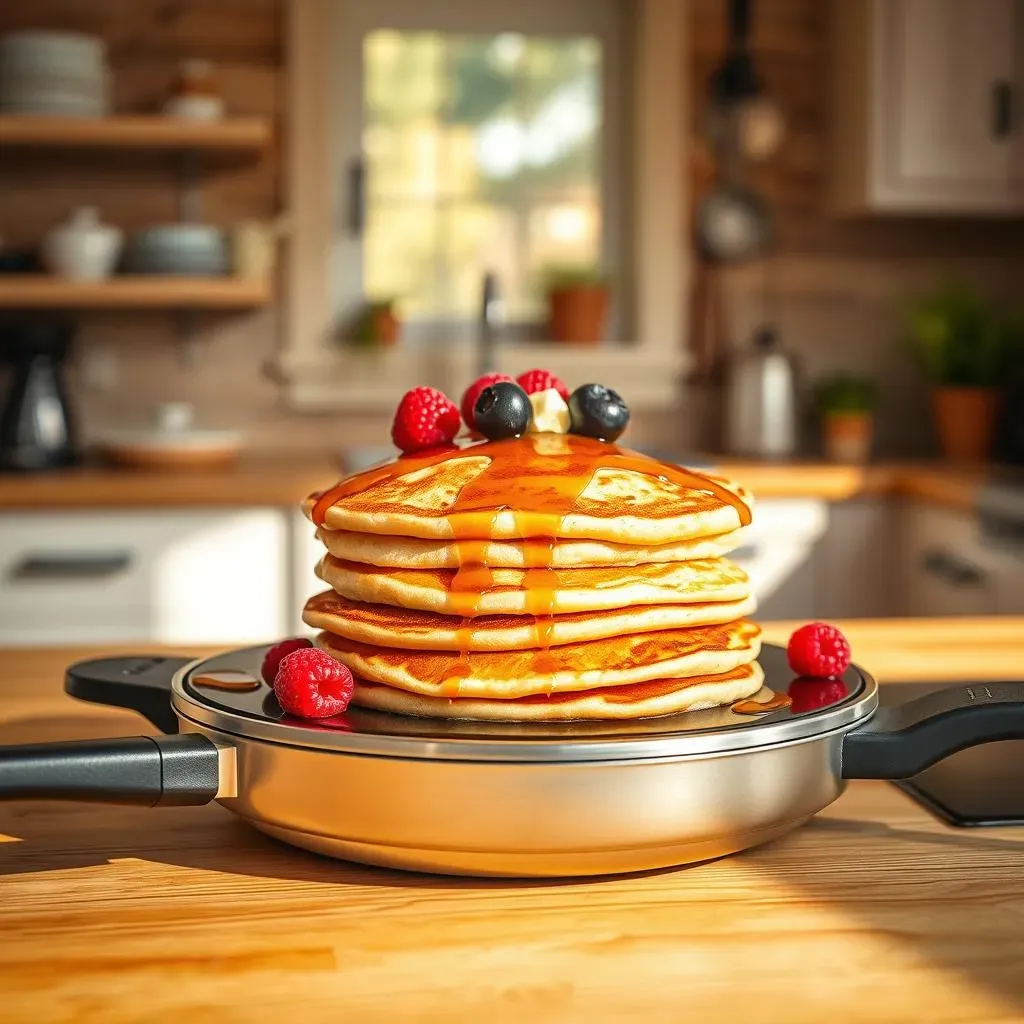
so you've made a stack of beautiful, golden pancakes – congratulations! Now comes the really fun part: the toppings! This is where you can really get creative and let your taste buds go wild. The classic combo, of course, is butter and maple syrup. You can't go wrong with that. But, if you want to venture out a bit, the possibilities are endless. I’m a big fan of fresh berries – strawberries, blueberries, raspberries – they all add a burst of flavor and a touch of freshness. A dollop of whipped cream never hurt anyone either, right? And if you're feeling a little indulgent, chocolate chips or a drizzle of chocolate sauce can take your pancakes to the next level. Don't be afraid to mix and match, and find your perfect pancake topping combo. It's like building your own sundae, but with pancakes!
For a little extra zing, try a dollop of sour cream or Greek yogurt. It might sound a little strange, but the tanginess pairs really well with the sweetness of the pancakes and syrup. You can also add some chopped nuts for a bit of crunch, like walnuts or pecans. Or, if you're feeling adventurous, try some caramelized bananas or a fruit compote. And don't forget about the savory side. A little bit of crispy bacon or a fried egg can turn your pancakes into a complete meal. The key is to have fun and experiment with different flavors and textures. It’s your pancake party, so do it your way!
Topping | Why It Works |
|---|---|
Maple Syrup | Classic sweet pairing |
Fresh Berries | Adds freshness and flavor |
Whipped Cream | Light and fluffy texture |
Chocolate Chips | Indulgent and rich |
Sour Cream/Yogurt | Adds tanginess |
Chopped Nuts | Adds crunch |
Saving for Later: Pancake Storage Tips
So, you’ve made a huge batch of pancakes, and you're wondering what to do with the leftovers (if you have any!). Don't worry; they’re super easy to store and reheat. If you plan on eating them within a few days, you can just pop them in the fridge. Make sure they're completely cool before you store them to prevent them from getting soggy. I usually stack them in a container with a piece of parchment paper between each pancake to prevent them from sticking together. They’ll keep in the fridge for up to a week, and they’re perfect for a quick breakfast or snack. It's like having a little pancake emergency kit ready to go!
If you want to keep them for longer, you can freeze them. Lay the pancakes flat on a baking sheet and put them in the freezer for about an hour. Once they’re frozen solid, you can transfer them to a freezer bag or container. This prevents them from sticking together and allows you to take out just a few at a time. They’ll keep in the freezer for up to two months. When you’re ready to eat them, you can reheat them in the microwave, toaster, or even back on the electric skillet. They might not be quite as fluffy as the day you made them, but they'll still be delicious. It's like having a little time capsule of pancake goodness!
- Cool completely before storing
- Stack with parchment paper in fridge
- Freeze individually on baking sheet first
- Store in freezer bag for up to 2 months
Beyond Pancakes: Electric Skillet Adventures
Now, you might be thinking that an electric skillet is just for pancakes, but oh, my friend, you are so wrong! This handy appliance is a true kitchen workhorse. I use mine for everything from grilled cheese sandwiches to quesadillas. It's perfect for cooking up a big batch of bacon or sausage, and it’s great for making breakfast hash. You can even use it to sauté vegetables or cook up some stir-fry. It's like having an extra burner on your stovetop, but it's portable and easy to clean. The possibilities are endless!
I love using my electric skillet when I'm making a big family brunch. I can keep the bacon warm on one side while I'm cooking the eggs on the other. It's a lifesaver when you have a lot of people to feed. And when it comes to cleaning, it's a breeze. Most electric skillets have a non-stick surface, so all you need to do is wipe it down with a damp cloth or sponge. It's so much easier than scrubbing a big pot or pan! So, don't let your electric skillet gather dust in the cabinet; pull it out and start experimenting. You might just be surprised at how versatile it is. It’s like having a secret weapon in your kitchen arsenal, ready to tackle any cooking challenge.
"The electric skillet is a versatile tool that can be used for more than just pancakes. It's great for everything from breakfast to dinner." - *Chef Ramsey (not really, but imagine he said it!)*
Wrapping Up: Your Electric Skillet Pancake Mastery
So, there you have it – your guide to making amazing pancakes on an electric skillet. From the perfect batter consistency to the ideal cooking temperature, you now have the know-how to create a breakfast that'll make everyone smile. Remember, practice makes perfect, so don't be discouraged if your first batch isn't flawless. The most important thing is to have fun and experiment with different toppings to find your favorites. Now that you're armed with these pancake cooking tips for electric skillet, I encourage you to go forth and create your own delicious memories. And hey, if you discover some amazing topping combinations or secret techniques along the way, be sure to share them with me! Happy cooking, and may your stacks always be high and your syrup always be flowing.